

Unproductive meetings are a problem! Recent surveys suggest that around 70% of company executives fear meetings are hampering their productivity. This is backed up by a recent survey conducted this year that found that over 50% of remote workers would prefer to spend less time in video calls, with 42% claiming they’re more productive when allowed to work for long periods of time uninterrupted.
However, if you operate with a remote workforce you’ll understand the value of virtual meetings in terms of improving staff morale, developing corporate culture and keeping remote employees up-to-date with the latest company-wide developments.
Fortunately for users of Microsoft Teams, the platforms come packed with features designed to make virtual meetings more fruitful. Let’s explore a few of these, so that you can make your meetings worthwhile.
Recording Meetings
The ability to record a meeting is extremely beneficial in situations where someone is unable to attend or where the meeting conveys a lot of important information. Meeting recordings can be saved to a Teams channel for future reference or review purposes.
Here’s how you can go about recording your next meeting…
First, schedule or launch a meeting by navigating to the calendar tab on the left of the Teams window. Now from here you can either hold a private meeting immediately or schedule a meeting; both allow the option to record, but we’d recommend scheduling a meeting within a channel so that the recording gets posted to conversation thread of a specific teams channel. To do this, select ‘New Meeting’ and enter the relevant channel name into the form that appears as shown below.

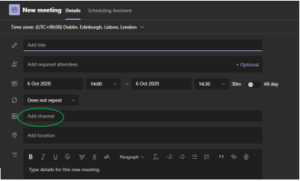
Once your meeting has been set up, its details will appear in the chosen channel’s conversation thread.

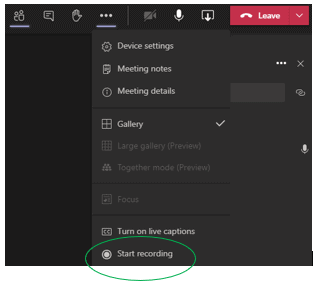
Once your meeting is underway you can start recording. To do so, navigate to ‘more actions’ located among the meeting control buttons, and then select ‘start recording’ from the drop-down menu.
To stop recording, either ‘hang up’ or click ‘stop recording’ from the ‘more actions’ menu. When the meeting is over you’ll be able to retrieve the recording from the channel conversation feed. At first, the recording will be unavailable, as Microsoft Stream will need time to process the file. Once the recording has been processed, everyone with channel access will be able to view it, and it will appear in the channel feed like this…

Meeting Notes
Sometimes rather than a recording, all you need is an abridged record of a meetings’ core information. Meeting Notes are a great way to note down that vital information for future reference. Taking meeting notes is simple…
First, schedule a meeting and add this meeting to the relevant channel. This is important, as this channel is where your meeting notes will be saved.
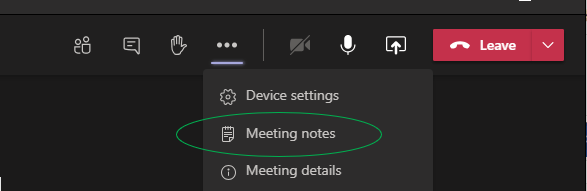
Then navigate to the ‘more actions’ menu as before, and select ‘meeting notes.’
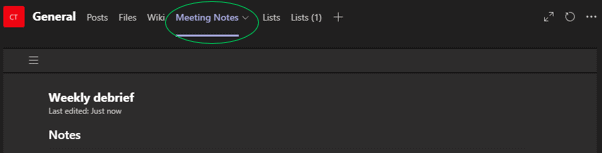
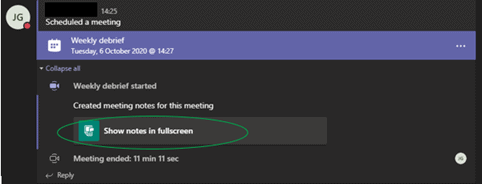
Following a recent update to the meetings experience in Teams, the note-feature now opens in the Teams app window. You’ll notice that a new tab entitled ‘meeting notes’ has automatically been created in the chosen channel; this is where all meting notes pertinent to this channel will be stored in the future.
As with recordings, meeting notes will also appear in the channel’s conversation feed as shown below.
Background Effects feature
When working remotely, seeing the faces of our colleagues in a virtual meeting helps provide that human connection we all crave. While many employees enjoy being on camera, for others, having their home on display for all to see can be an anxiety-inducing experience. A busy background can also distract meeting participants, and in certain situations, an attendee may want to obscure a background for privacy or data security reasons. Thankfully Teams’ ‘Background Effects‘ feature can blur background details while keeping the subject matter (you) in focus! Alternatively, the feature can now replace your background with a number of computer-generated alternatives.
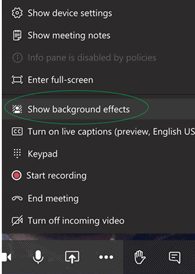
To activate, turn on your camera and select ‘show background effects’ from the ‘more actions’ menu as shown.
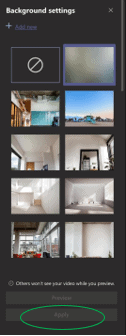
A menu will then appear on the right, displaying a number of different background settings, the first of which is an option to simply blur your background. To use one of these settings, click one and select ‘apply.’ You can also preview the effects before applying them.
We’re Elixis Technology
In the ever-changing, technology-centric world we live in, it’s vital to have an I.T. solution source you can count on. At Elixis Technology, it is our mission to help businesses — big and small — produce the results their customers demand, with technology that actually works.