

One of the most significant Microsoft 365 developments of 2020 has been the launch of the new Microsoft Lists app. For years users have only been able to use the ‘Lists’ feature through SharePoint, but now, the Lists tool has been made accessible through a standalone web application, and an app that you can launch within Microsoft Teams.
What is a list?
Up until recently, a ‘List’ was a content item you could set up within a SharePoint site for storing information that relates to the site’s contents. The highly customisable nature of a List allows you to store information in a variety of formats, so the information you choose to store is entirely up to you. Some common uses include the storing of contact details, weblinks, employee data and the management of complaints or support tickets.
The New Lists app has introduced a series of fundamental changes to the Lists experience and thanks to Teams compatibility, you can now attach Lists to a Teams channel to bring data and conversation together in a way that wasn’t previously possible.
Microsoft Lists and Teams
In this blog, we will explore the Lists app within Teams. Let’s get started.
Firstly, you’ll have to add Lists to the channels where you want to use it. The best way to do this is to navigate to the relevant channel and add lists through the ‘add a tab’ button at the top of the window, indicated by a ‘+.’

Then search for ‘Lists’ using the search box provided.
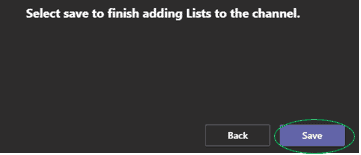
You’ll then be prompted to click save to add Lists to your channel…
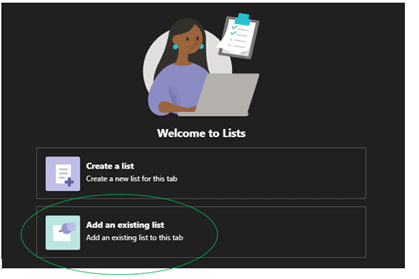
Upon adding Lists to the channel, you’ll be given the option to either create a new list or add a pre-existing one.
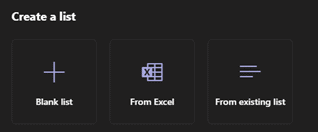
Choosing ‘Create a List’ will redirect you to a page which sets out your options. You can either create a new list from the ground up, base a list on an excel file or format your new list on an existing one.
Below these options you’ll find a new feature; templates. These provide pre-configured List formats designed to fast-track the listed building process and ensure consistency. These templates aren’t rigid; you can add and remove columns to suit your specific data storage requirements. There are currently 11 list templates available as shown below.
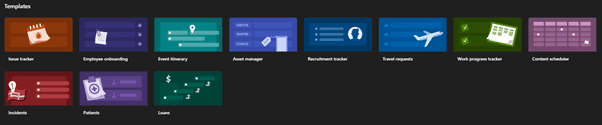
Upon selecting one of these templates you’ll be shown a preview so you can decide whether it meets your requirements. If it does, click ‘use template’ in the bottom right.

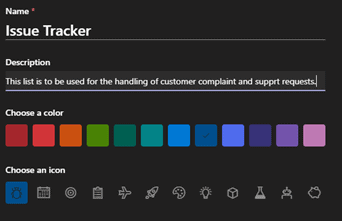
Then, name your List, add an optional description and choose a colour and icon for ease of identification. Click ‘create’ in the bottom right when finished.
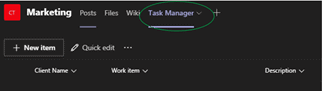
You now have a List pinned to your channel, and you’ll notice it displayed among your channel tabs with the name you gave it.

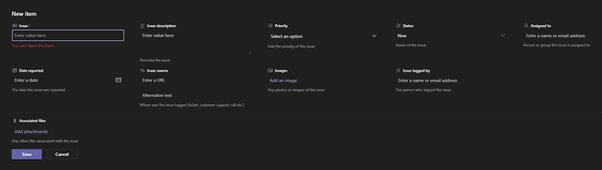
You’re now ready to populate your list with data. Click on your list and select ‘New Item.’ You’ll then see a form representing one row of the List. You might refer to this as a row, item, or entry. Once you’ve entered the required information, click ‘save’ and the item will be added to your list.
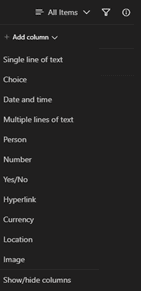
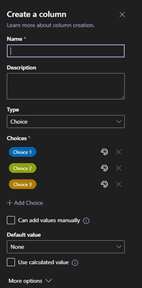
As we’ve mentioned, you can modify a list to conform to the specific data you wish to record. To the right of your list’s column headings, you’ll see ‘Add Column.’ Choose the format of your new column from the drop-down list, and then add a column name, description and further details in the ‘create a column’ form that appears.
Now that we’ve looked at the basics of establishing a new list, let’s look at how to pin an existing list to a channel.
Again, navigate to the channel where you want to add the List, click ‘add a tab’ and then select the Lists app.
This time select ‘add an existing list’ when prompted.
You’ll then be presented with 2 options: you can either add a list using a weblink; or attach a List that is already available within the Team site you are in.
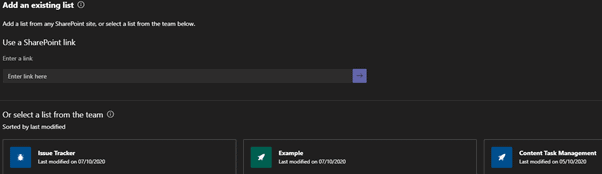
The SharePoint link option also works with links to the Lists browser app. To use a link, navigate to the Lists app or the SharePoint site where the list is stored, open the list and then copy and paste the list’s web address into the ‘enter link here box.’ The Lists app is a great way to manage your Lists, as it displays on a single screen all the lists you’ve created across different Team sites.
The second option lets you add lists that are already available within the team – Lists which aren’t available in the same team will have to be added using the link option. Upon selecting a list from those available it will immediately appear as a tab within the channel.

A couple of points to note…
Lists stored in your OneDrive cannot be synced to Teams. Attempting to use a OneDrive URL to add a pre-existing list stored there will result in a ‘file not found’ error message.
If the list you wish to attach to a channel originates from a different Team site problems can occur. Only individuals who also have access to the origin site will be able to view the list data.
We’re Elixis Technology
In the ever-changing, technology-centric world we live in, it’s vital to have an I.T. solution source you can count on. At Elixis Technology, it is our mission to help businesses — big and small — produce the results their customers demand, with technology that actually works.